Getting started with Redux
Part - I (Overview of Redux)

Introduction
State management is a really big problem in React applications especially when we have too many nested components in our application. In this article ( and in upcoming articles) we will look into one of the ways to do the state management in our React application using the Redux library.
What is Redux?
Redux is a predictable, state container for Javascript applications.
Let's dive deep into the above definition and what I meant by it:-
Predictable - Redux is predictable in a way that all state transitions are explicit and it is possible to keep track of state transitions based on different actions.
State Container - Redux stores the state of your entire application as an object and will help you manage that state in a predictable way.
Why Redux?
Using redux in your application is completely optional and depends on the following factors -
- If anytime in your react application you feel that a large amount of application state is needed at multiple places.
- States are updated very frequently.
- Logic to update the state is complex
- You want to track when, why & how the state is updated based on actions dispatched.
Redux Principles
- First Principle - The state of your whole application is stored in an object tree within a single store.
- Second Principle - The only way to change the state of your application is to emit an action object describing what happened.
- Third Principle - To specify how the state tree is transformed by actions, we write pure reducer functions (can be more than one)
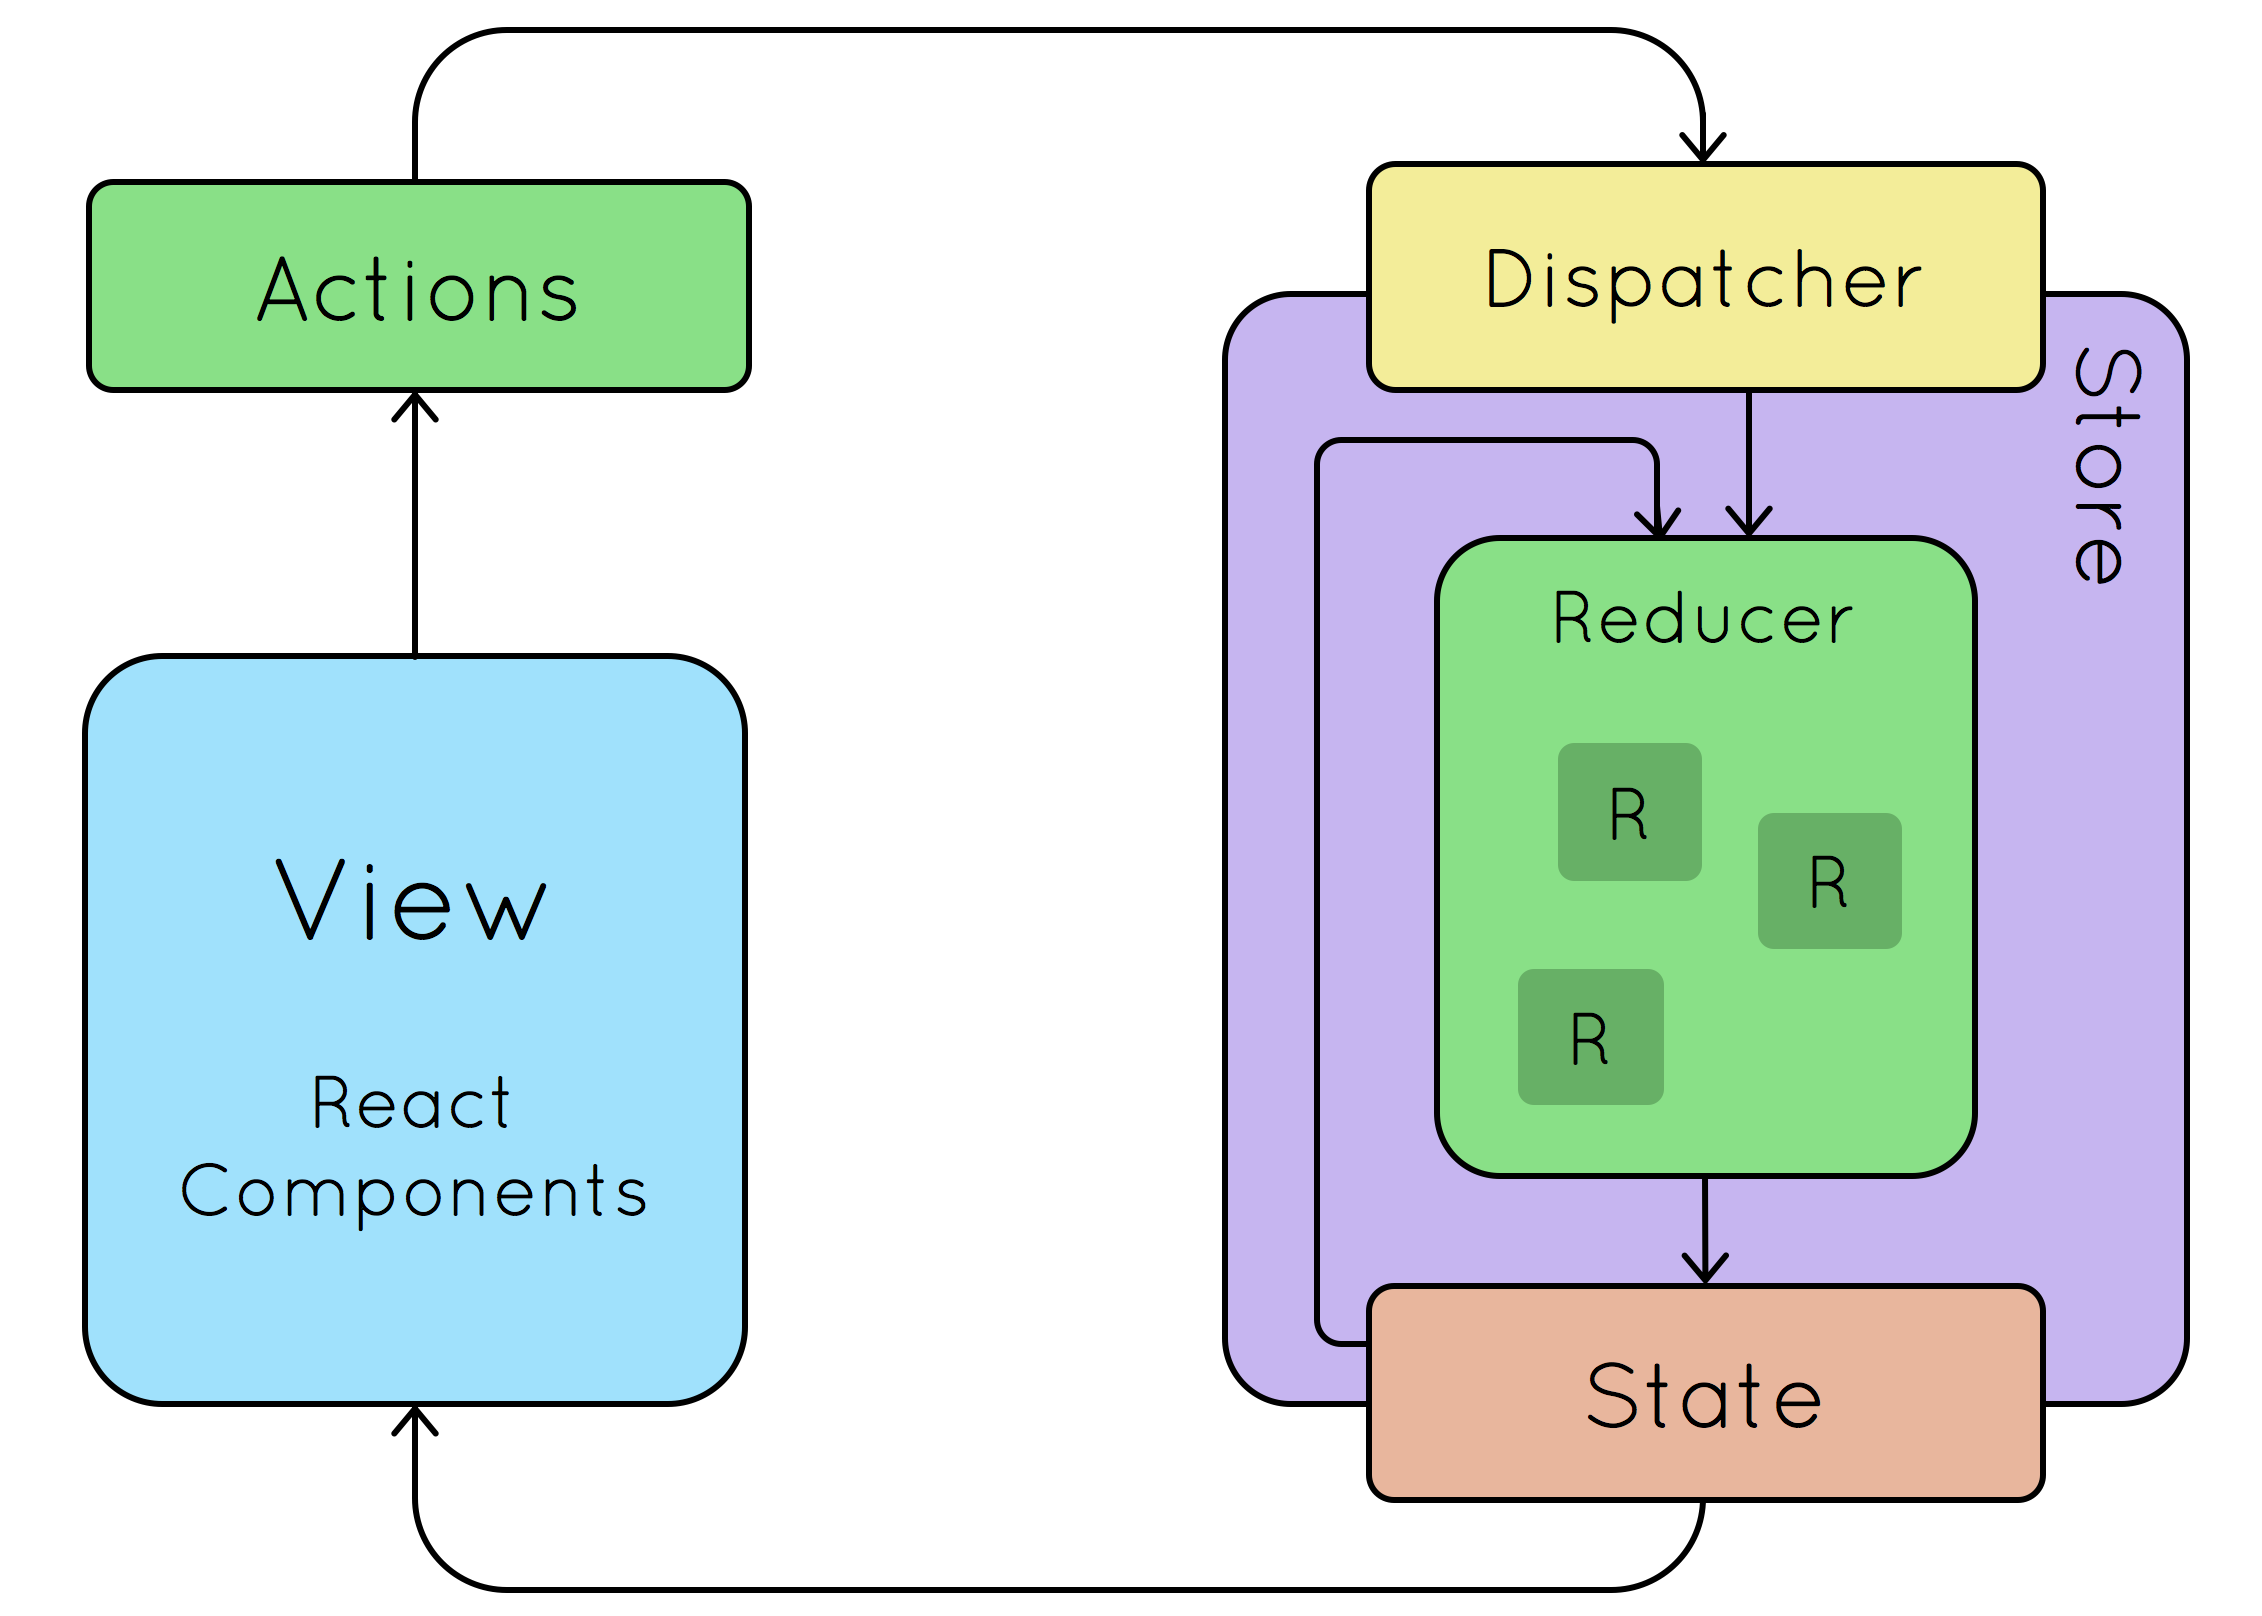
Components of Redux
1.Action - It is a plain Javascript object which describes what happened in the application.
It usually has two properties -
- type - to describe action type
- payload - that contain extra information of action
  {
    type : 'increment',
    payload : { value : 2 }
  }
We can also create string constants separately for these actions and use them in our code to easily change it over time.
    const COUNTER_INCREMENT = 'Counter Increment';

    const incrementAction = {
      type : COUNTER_INCREMENT,
      payload : { value : 2 }
    }
Also, we can create Action Creators for different actions so that it will be easy to modify any change in the action object at one place rather than changing it in multiple places.
Action Creator - It is a function that returns an action object.
    function increment() {
      return {
        type : COUNTER_INCREMENT,
        payload : { value : 2 }
      }
    }
2.Reducer - It is a pure function that specifies how the state changes are done in response to the action sent to the store.
- It always performs pure operations (not mutate any of its arguments but rather make a copy)
const initialState = { value : 0 }

function Reducer(state = initialState , action){
  switch(action.type){
    case COUNTER_INCREMENT :
      return { ...state , value :  state.value + 1}
    default :
      return state;
  }
}
Our reducer function can have multiple cases for handling different action types and the logic for state transition for those actions.
Note- In the above example we only have one property in our state but still we are making a copy of it (using the spread operator) and then updating a value.
3.Store - One store for the entire application.
- Allows access to the state of our application using getState().
- Allows the state to be updated via dispatch(action).
- Registers listeners via subscribe(listener).
- Handles unregistering of listeners via the function returned by subscribe(listener)
import {createStore} from 'redux'

const store = createStore( reducerFunction )

console.log('Initial State - ' , store.getState())
// Initial State - { value : 0 }

const unsubscribe =
  store.subscribe(()=> console.log('Updated State -',store.getState()))

store.dispatch(increment())   // Updated State - { value : 1 }
store.dispatch(increment())   // Updated State - { value : 2 }
store.dispatch(increment())   // Updated State - { value : 3 }

store.unsubscribe()
Conclusion
Hope you might have understood the basic concepts of Redux by reading this article and are ready to use Redux in your next project.

If you liked this article, please be sure to ❤ it. Thanks in Advance😊.


